Project import/export
Notes:
- Introduced in GitLab 8.9.
- Importing will not be possible if the import instance version is lower than that of the exporter.
- For existing installations, the project import option has to be enabled in application settings (
/admin/application_settings) under 'Import sources'. You will have to be an administrator to enable and use the import functionality.- You can find some useful raketasks if you are an administrator in the import_export raketask.
- The exports are stored in a temporary shared directory and are deleted every 24 hours by a specific worker.
Existing projects running on any GitLab instance or GitLab.com can be exported with all their related data and be moved into a new GitLab instance.
Exported contents
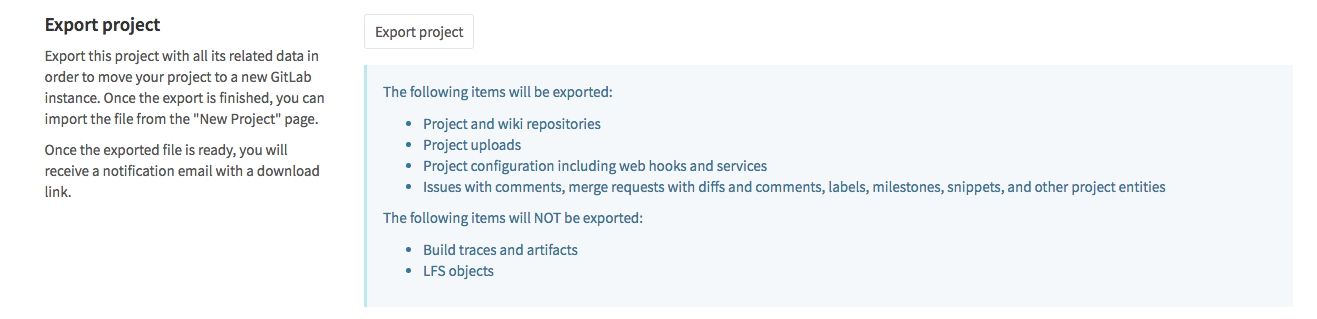
The following items will be exported:
- Project and wiki repositories
- Project uploads
- Project configuration including web hooks and services
- Issues with comments, merge requests with diffs and comments, labels, milestones, snippets, and other project entities
The following items will NOT be exported:
- Build traces and artifacts
- LFS objects
Exporting a project and its data
-
Go to the project settings page by clicking on Edit Project:

-
Scroll down to find the Export project button:
-
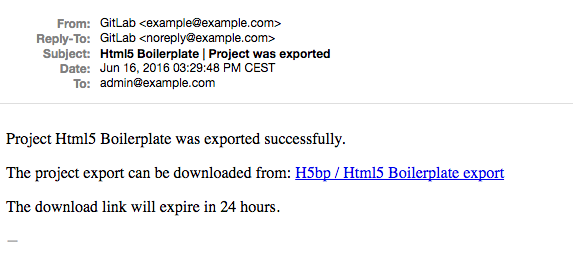
Once the export is generated, you should receive an e-mail with a link to download the file:
-
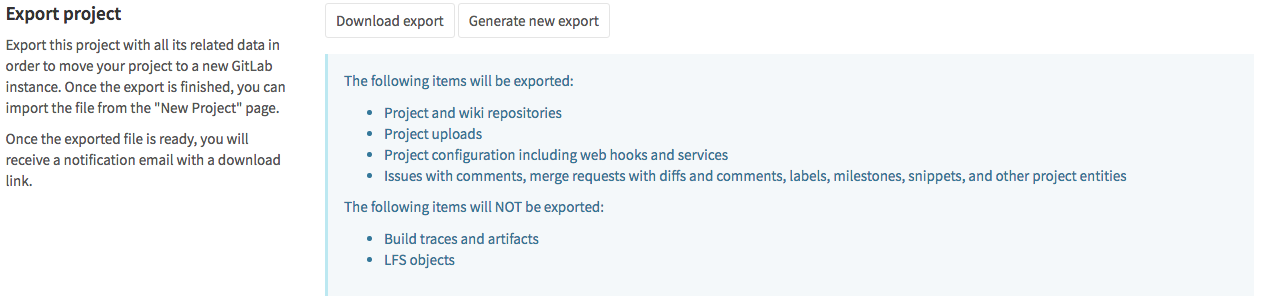
Alternatively, you can come back to the project settings and download the file from there, or generate a new export. Once the file available, the page should show the Download export button:
Importing the project
-
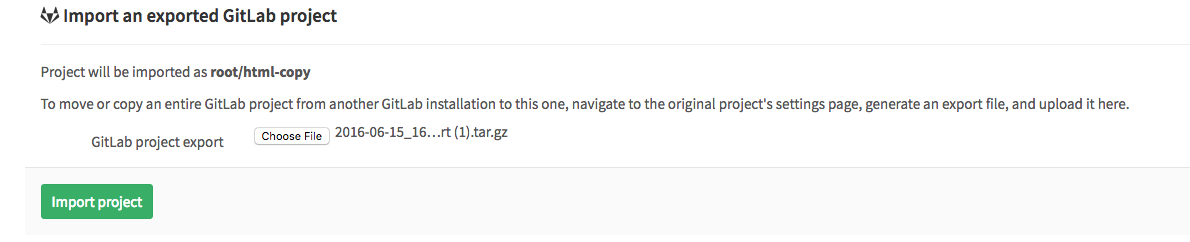
The new GitLab project import feature is at the far right of the import options when creating a New Project. Make sure you are in the right namespace and you have entered a project name. Click on GitLab export:

-
You can see where the project will be imported to. You can now select file exported previously:
Click on Import project to begin importing. Your newly imported project page will appear soon.